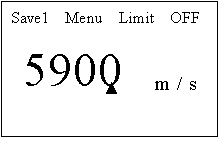
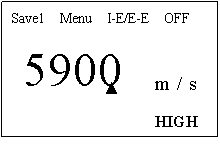
Interfaces:
UM-1/UM-2 UM-1D/UM-2D UM-3


Operating principles, modes and measuring ranges:
UM-1/UM-2 ultrasonic thickness gauge measures the thickness of an object by precisely calculating the time of the probe sending ultrasonic pulse with the help of couplant to the object and passing through the object until the probe receiving the reflection from the boundary. The operating principle is P-E (pause-echo). The measuring range is 0.031''-11.811''.
There are two operating modes of UM-1D/UM-2D ultrasonic thickness gauge: standard mode and coating mode. The operating principle of coating mode is E-E (echo-echo). When there is coating or oil paint on the surface of the object, the net thickness of the material can be directly measured neither have to remove the coating nor calibrating. While the defect of this mode is that the measuring range is relatively narrow: 0.118' ' -0.709' ' (with standard probe). The operating principle of standard mode is P-E. With the covered coating, the measurement will not be very accurate, so the coating should be removed before measuring in standard mode. The advantage of this mode is that the measuring range is relatively wide: 0.031' ' -19.685' ' (with standard probe).
Single-crystal delayed probe is employed by UM-3 precise ultrasonic thickness gauge. The multi-echo is used to enhance the accuracy with the resolution of 0.0001' ' and the low limit of 0.012' '. There are two operating modes of UM-3 ultrasonic thickness gauge: I-E (interface-echo) mode and E-E mode. The measuring range of I-E mode is 0.059' ' -0.709' ', while the measuring range of E-E mode is 0.012' ' -0.394' '.
The operating principle of UM-3 is: THICKNESS= (VELOCITY × TIME )/n Note: n is the number of times of the echo. The more echoes, the higher the accuracy.
System setup :
Basic items of UM-1/UM-2/UM-1D/UM-2D/UM-3: units, min capture, 2-point cal and language.
Additional items of UM-2/UM-2D: probe and resolution.
Additional item of UM-3: resolution.
Probe:
UM-1/UM-1D/UM-3 ultrasonic thickness gauge cannot recognize probes. UM-1/UM-1D is matched with standard probe PT-08 when leaving factory, while the standard probe of UM-3 is single-crystal delayed probe. However, the probe of UM-1/UM-1D can be changed. UM-1D with probe PT-08 can be applied in standard mode as well as the coating mode, but the gauge can only be applied in standard mode with other probes attached. (Our company can also use other probe compensating wires in replace to the PT-08 compensating wire to meet your special testing requirements, so that you can use different types of probes in the coating mode. Please connect with us when you have special requirements.) UM-3 is used for precise measurement, so only the single-crystal delayed probe can be applied.
UM-2/UM-2D is matched with standard probe PT-08 when leaving factory. With many probe compensating wires in the gauge, UM-2/UM-2D can recognize and can be matched with various probes ( PT-08 , 5P-10 , PT-12 , ZT-12 , TG790H , PT-04 , PT-06 ) freely when measuring. UM-2D can be applied with different probes in both modes.
Repeatability:
UM-1: ± 0.1mm or ± 0.004' '
UM-2/UM-1D/UM-2D: ± 0.05mm or ± 0.002' '
Digital resolution and measuring error:
| Type | UM-3 | UM-2/UM-2D | UM-1/UM-1D | |
| Specifications |
Digital resolution
Unit: inch H: the height of the testing object |
H < 0.4' ' : 0.0001/ 0.001/ 0.01 H≥ 0.4' ': 0.001/ 0.01 |
H < 4' ' : 0.001 /0.01 H≥ 4' ': 0.01 |
0.01 |
|
Measuring error Unit: inch H: the height of the testing object |
± 0.0002' ' (Up to 0.118' ')
± 0.002' ' (Up to 0.787' ') |
±(0.5%H+ 0.0004' ') | ±(1%H+ 0.004' ') |

